
Autopsy Digital Forensic
Quick lab walk-through
After following the Autopsy (The Sleuth Kit) on-line training I decided to recap the basic functions of the Autopsy GUI digital forensic framework in a short blog post.

What is Autopsy
A program that allows you to efficiently analyze hard drives and smart phones. Contains a C library that allows you to analyze disk images and recover files from them. It is used by law enforcement, military, and corporate examiners to investigate what happened on a computer. You can even use it to recover photos from your camera’s memory card.
Cool functions:
- Timeline Analysis - event viewing interface
- Hash Filtering - Flag known bad files and ignore known good.
- Keyword Search - Indexed keyword search to find files that mention relevant terms.
- Web Artifacts - Extract history, bookmarks, and cookies from Firefox, Chrome, and IE.
- Data Carving - Recover deleted files from unallocated space
- Multimedia - Extract EXIF metadata from photos and videos
- Indicators of Compromise - Scan a computer using STIX.
If you want to skip the quick Autopsy introduction, jump below.
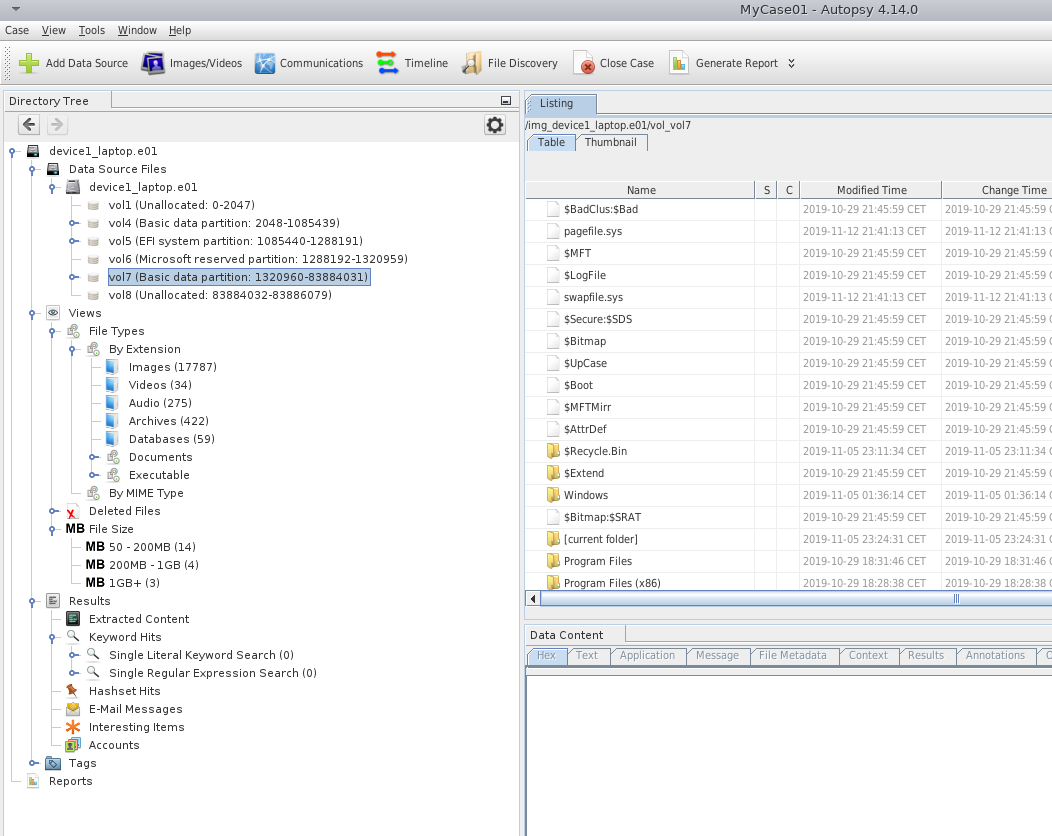
Here is the view of Autopsy windows after a successful disk import.
Central repository and multi user
- It stores hashset to be shared with others
- Access older hashsets from older cases
- It uses PostgresSQL (for distributed) or SQLite (for local)
- It is not enabled by default
- Useful to share data to multiple users, work together on cases
Want multi user deployment? Need central shared storage and 2 servers
- All users need to have access to the same base dir (ex. \\crserver.local\data..)
- One case can be open at a time, it will be automatically saved
- autopsy.db –> SQLite file will store basic case info
- module folder
- report folder
- export folder
Basic Forensic Workflow
- Create case
- Add data source
- Configure keywords
- Run ingest with all modules
- Start review as data comes in
- Update keywords as you find stuff
- Tag interesting files
- Generate report
Add new data source
These type of data sources can be imported and analyzed by Autopsy.
- Disk images, Virtual machine drives (vhdi, ..)
- Local Drives
- Local files/folders
- Autopsy logical image
- Unallocated raw space files
Disk Images
- Raw data (dd)
- E01
- Raw images of phones
- Virtual machines files
Remember, it will not validate E01 files on import!
Volume Systems organize a disk into one or more volumes (partitions):
- DOS, GPT, Mac, BSD, Solaris
- will show areas of disk that are not in a volume
File Systems are data structures that allows to store files.
- NTFS, FAT, HFS+, ISO9660, ExtX..
Orphan files are deleted files without a parent folder ($OrphanFiles) finding them in FAT is time intensive, remember to disable it!
Carving
Carving is the act of recovering deleted files without relying on fs knowledge but on file structure internals: ($CarvedFiles folder, done with the Ingest module)
- It scans the raw data and determine starting and ending of each file type, using the so called
magic bytes - It can recover the files from unpartitioned/unformatted data
- jpeg, pdf, word, zip, db, exe..
- Needed when no pointers to the files exist anymore (also for deleted files!)
What happens when a file is deleted?
- Before deletion file1.jpg has metadata, showing size, date of creation, etc.. Every file has a pointer in the file system which allows the user to access the data on the disk related to that file.
- After the deletion, the pointer is deleted so that the area of memory can’t be referenced anymore, but the data is still there in the hard drive.
- To recover the data.. scan the memory, find magic bytes (beginning, end) and reconstruct the files together.
NOTE: Currently not supported data sources are RAID, LVM, Bitlocker.
By clicking on each file you will have many tabs showing all the information, from a hex view of the data, to the parsed output from an application or an ingestor module. Metadata and many other info are showed as well.
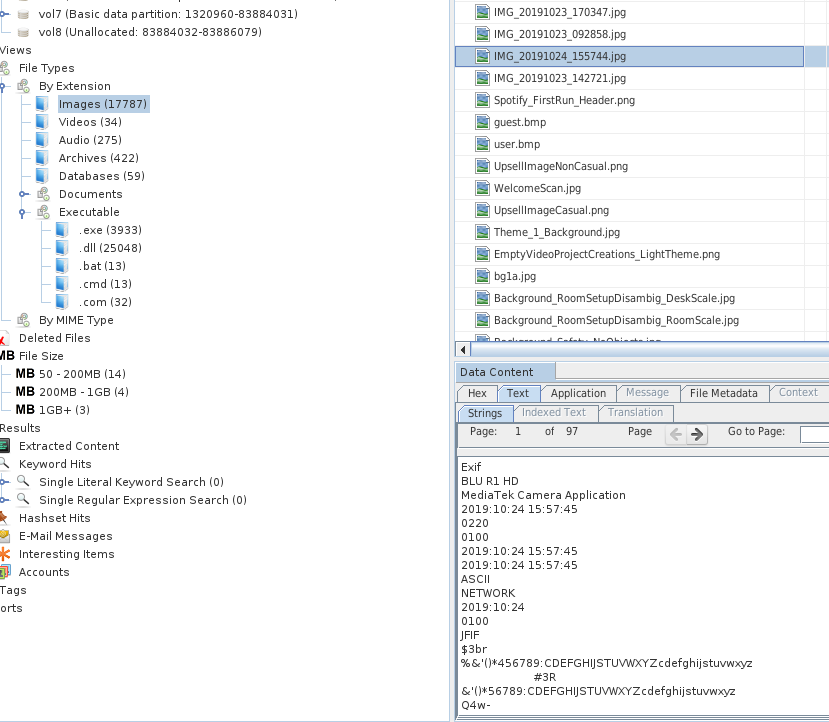
You can see on the left panel, Autopsy automatically group files both per extension, MIME type, and size.
Autopsy GUI
Each file showed:
- can be set as notable, suspicious, note
- Test –> strings, EXIF
- “other occurrences” tab (shows also if present in other cases)
Run ingestion modules
When importing a data source, ingestor modules can be set up and run to obtain all kinds of information, some of the pre-packaged are:
- hash calculation
- hash lookup
- exif extraction
- add text to keyword
- web browser analysis
- web cookie, credentials
The ingestor has a priority -> user content, then unallocated space.
It is possible to create Ingest filters -> rules, per extension, folder, useful for TRIAGE.
All the results from the Ingest modules pipelines go into “Extracted Content”.
What about the file hashes
- calculate the file hash
- stores it into the db for later reuse
- lookup in the hashset if its known as bad, in that case it will tag it.
Why tagging?
- to include in the report
- to identify notable bad files
- to update the central repo
Start reviewing
Hashsets:
- NIST National Software Reference Library (NSRL) -> flags known files
- custom one
Every File has a known status
- Notable, known bad
- Known
- Unknown
Hashset are NOT sorted, they are not indexed and searches are time consuming..
- index it (tick the box on the ingestion module config)
- then you can do binary search on it
- can be stored local/remotely and reused
When doing the indexing, do it on Linux, way more memory efficient, NOT ON WINDOWS.
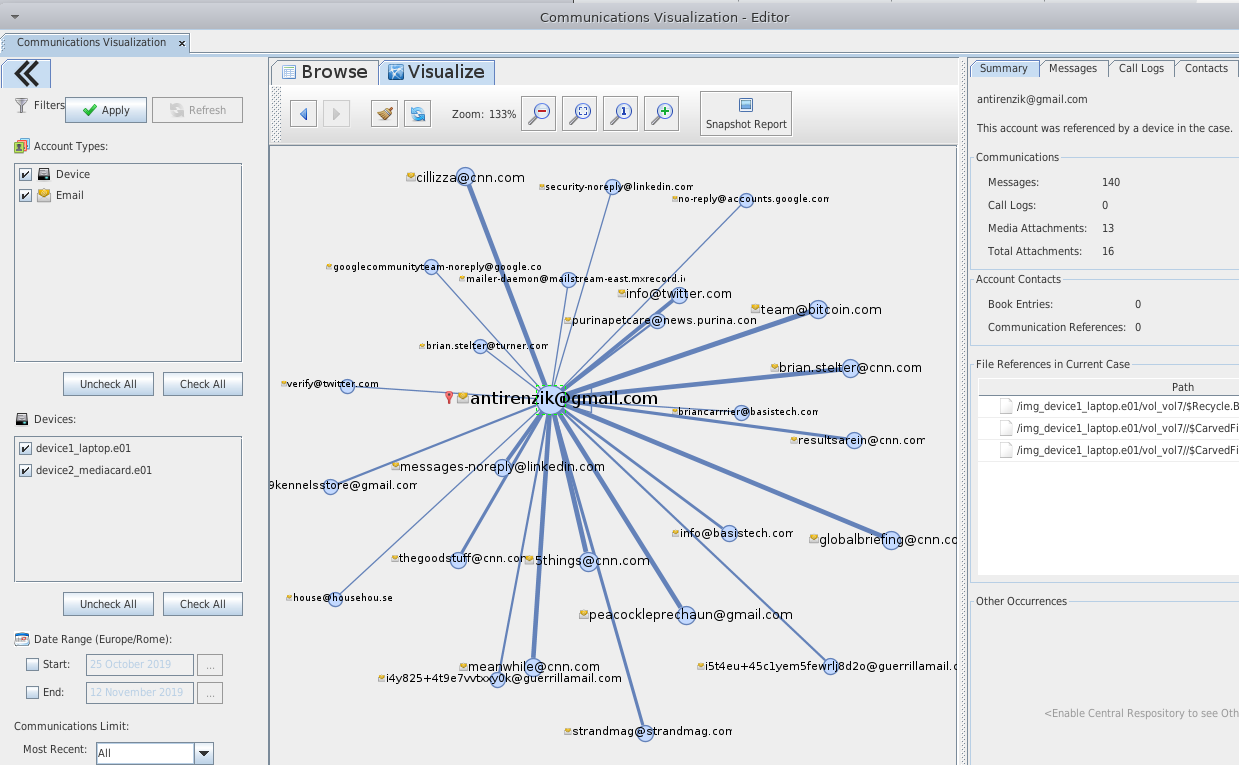
Here an example of the “Communication” tab showing all kinds of communications found on the disk, from emails, to phone calls and messages in case of an phone disk.
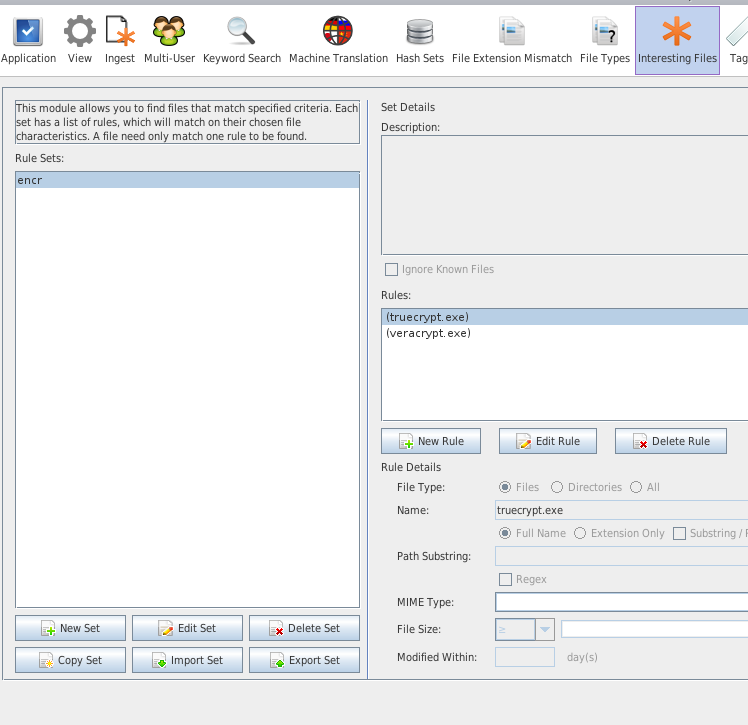
Create a new File type
You want to create a new file type, because the standard ones do not include a specific one? A new one to be highlighted for the investigation?
- custom –> tools/options/file types
- add the new magic bytes
Create report
Finally Autopsy can generate a HTML navigable report where all the findings, the manual tagged files and the suspicious files are listed.
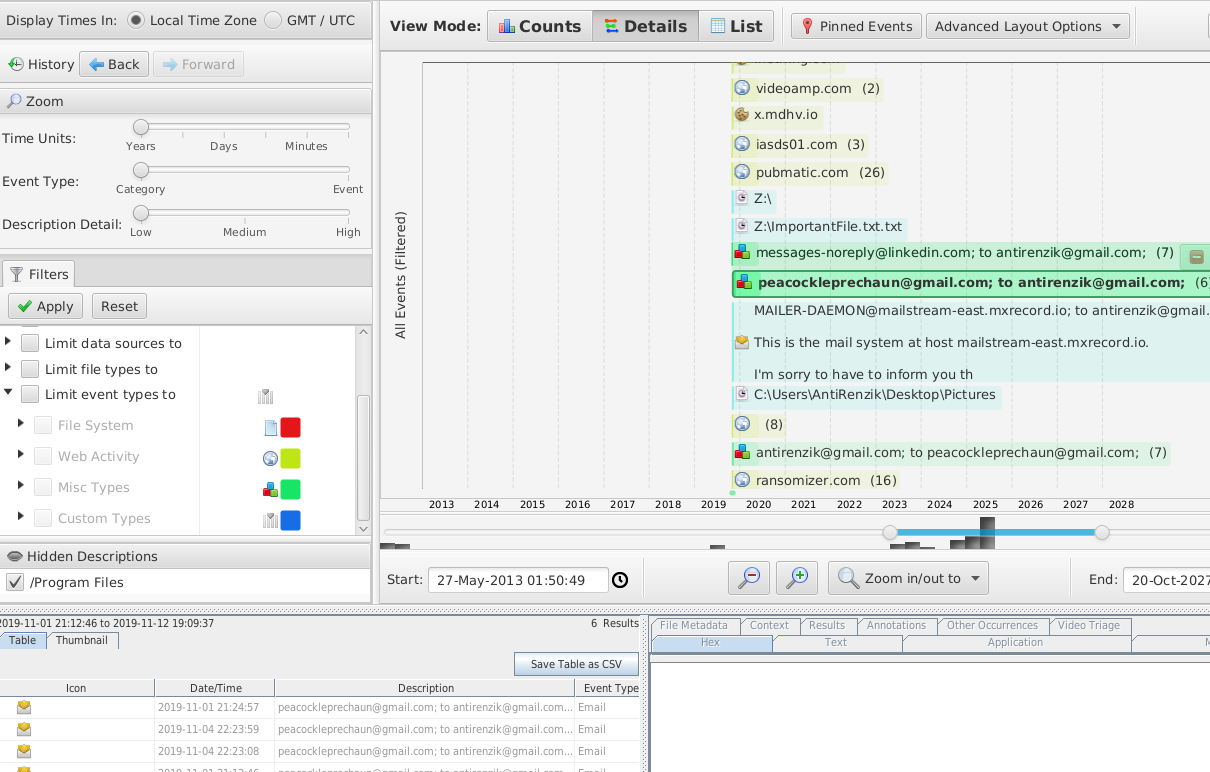
The timeline feature could come quite useful as well!
Note: data in the screenshot is not real, it is fake data.
This was a basic walk-through of the Autopsy GUI application, and notes from the official online training.
Please feel free to make any comment! If anything is unclear, just write in the comment and I will update the post!
Thanks for reading!
Carlo Alberto